 |
PREPARATION * Powered Electrically, ubiquitous and reliable
- Connect funnel to fill port located on top of the machine.
- Pour adequate amount of new brake fluid into the funnel.
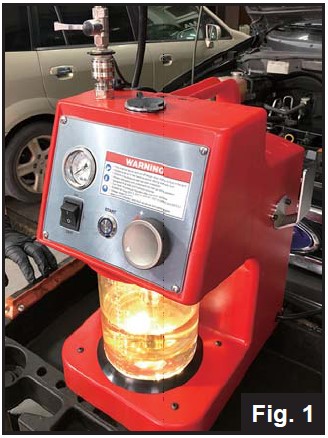
- Connect fill line connector to purge nipple (Fig. 1).
- Connect power line to a power socket.
- Press power button and activation button.
- Turn on the fluid control valve and start purging air from the machine
- Adjust the pressure regular from time to time to purge air from the machine thoroughly.
- Purge air for about 1 to 2 minutes, or until no air bubbles visible in the tank.
|
 |
LOW-PRESSURE LEAK TEST
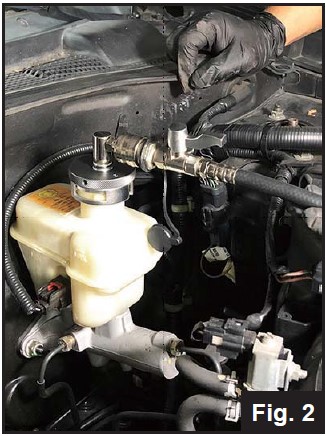
- Connect the adapter provided to master cylinder reservoir.
- Connect the fill line connector to the adapter.
- Turn on the power button and activation button.
- Increase pressure to 0.5 bar or 7 psi, and run for 1 minute, and check if there are leaks around the adapter on master cylinder reservoir (Fig. 2).
- Increase pressure to 1 bar or 14 psi, and run for another minute, and check leaks again.
- Adjust the adapter if leaks are found and clean the leaked fluid immediately.
|
 |
PRESSURE BLEEDING * Bleeding no bubbles
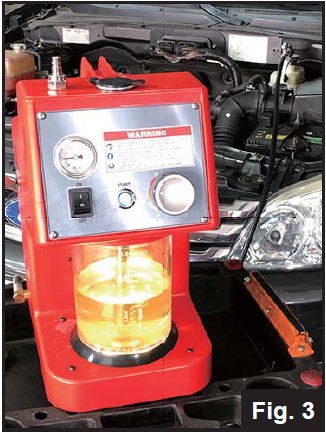
- When low-pressure leak test is performed and no leaks are found, turn the pressure regular clockwise to increase pressure to working pressure as suggested on the automotive manufacturer's manual(Fig. 3).
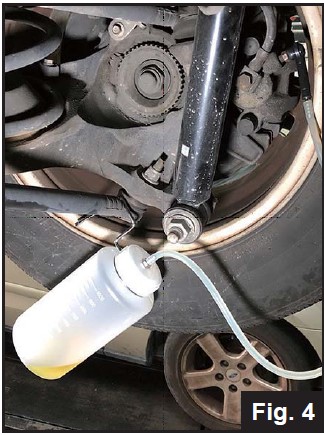
- Follow the correct sequence for wheel cylinder bleeding, as specified by the automotive manufacturer's manual, and unfasten the bleeder valves one after another. Bleeding until no air bubbles visible on the soft tube of the waste fluid catch bottle (Fig 4), or the color of the bled brake fluid changes, suggesting new brake fluid is being pushed out.
- When brake bleeding is done on four wheels, fasten the brake bleeder valves.
- Turn off the pressure regulator, and turn off the machine.
- Close the fluid control valve at the end of the fill line.
- Check brake fluid level in the master cylinder reservoir and adjust to the correct level. Close the original cap.
|


